
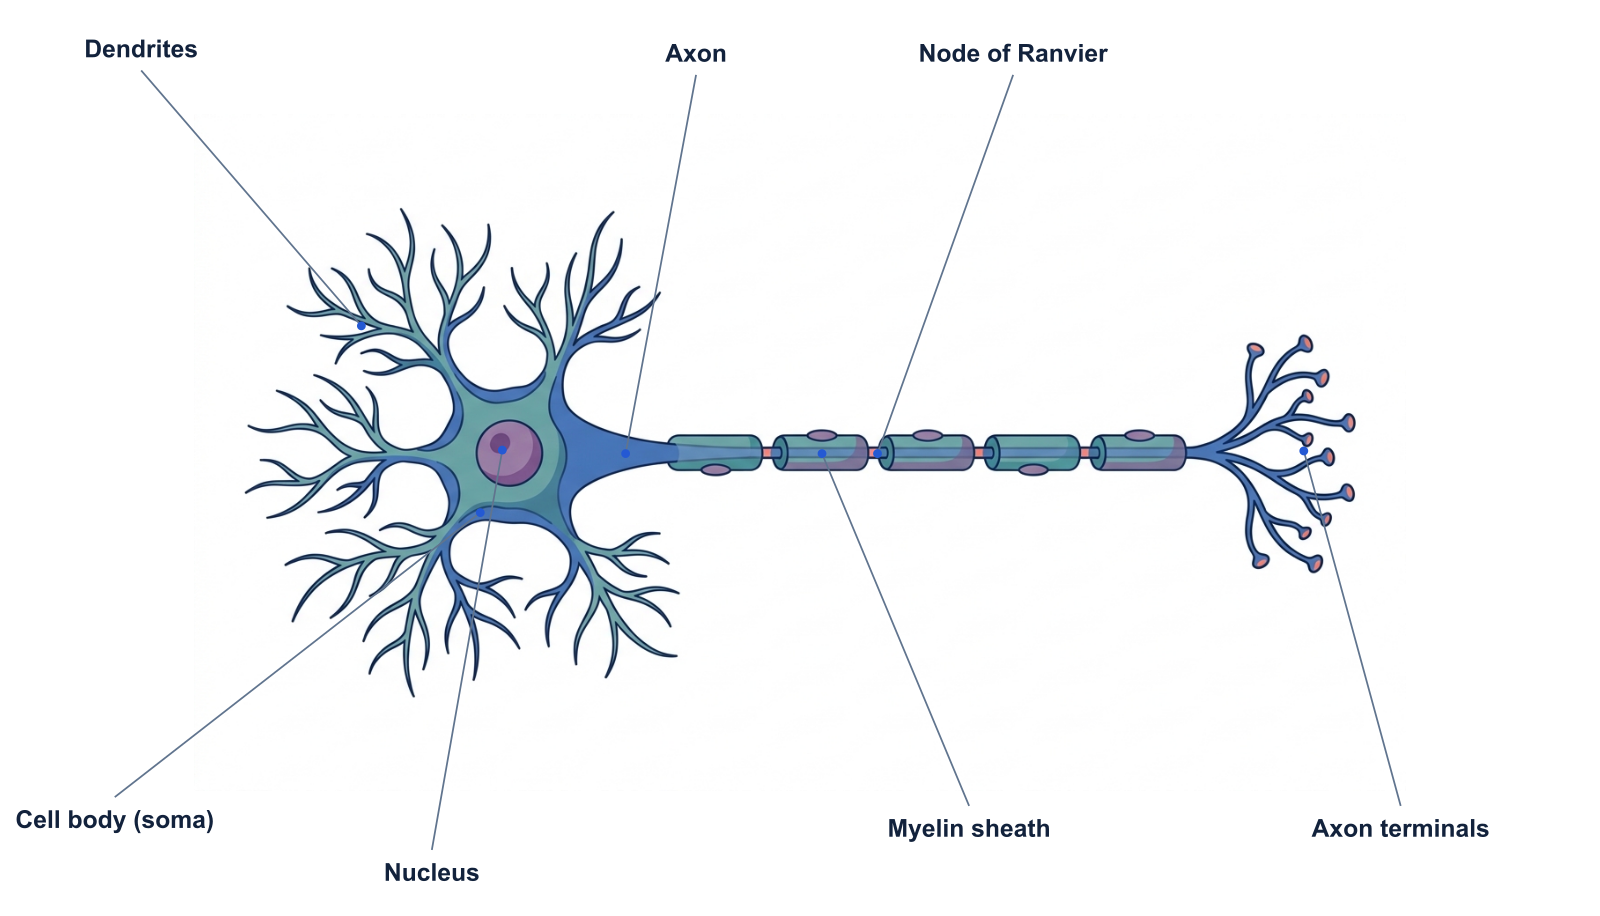
A teaching model with selected structures. Use different label sets to introduce anatomy and signaling as separate ideas.
A teaching diagram is part of an explanation. Its job changes across a lesson: it may introduce a structure, show a relationship, or help a learner retrieve a name without a prompt. Those jobs often benefit from different versions of the same picture.
Choose the one thing a learner should understand from the current view. If the diagram asks them to read a dozen labels while following several arrows, separate the ideas into stages.
Build the explanation as a sequence
For a neuron lesson, begin with the cell body and axon. Add the dendrites and terminals when discussing inputs and outputs. Then introduce myelin segments and nodes if conduction is the next concept.
Keep the underlying illustration stable across these views. Moving every structure between slides forces the audience to reconstruct the map just as you introduce a new idea.
Choose labels for the learner’s current task
Introductory labels should name the structures used in the explanation. Advanced terminology can be introduced in a later view or in the accompanying notes. Simplification should reduce detail while preserving the relationships that make the model useful.
Avoid replacing a correct technical term with a memorable but misleading phrase. A short explanation next to an accurate label is often better than a label that learners must unlearn later.
Create an unlabeled worksheet and answer key
Start with the unlabeled download from a diagram page. Ask students to place a small set of labels and explain one relationship. Provide the labeled version as the answer key after they have attempted the task.
Use a page layout appropriate to the class: US Letter or A4, with room for handwritten answers. Printing the page through the browser lets you choose the paper size; select the unlabeled view first if that is the version you want.
- Identification: point to the requested structure.
- Function: state what the structure contributes.
- Relationship: explain how two structures work together.
- Transfer: predict how the explanation changes in a different cell or setting.
Check the slide at viewing size
Use a strong title that states the idea of the slide. Reduce the number of labels before reducing their size. Put the diagram against a clear background and avoid relying on color alone to distinguish important components.
Read the slide at the size and distance relevant to the class. A laptop preview is not the same as a projected image at the back of a room. Exporting more pixels does not by itself make tiny labels readable.
Adapt to the course without inventing alignment
Different courses introduce structures at different levels of detail. Check your syllabus or examination specification before deciding which labels belong in a resource. A generalized cell diagram is not automatically aligned to AP Biology, GCSE, A-level or a provincial curriculum.
Save a version named for the actual teaching purpose, such as introductory membrane structure or axon conduction. That description is more useful for reusing your material than a vague final-version filename.
A prompt to start from
Frequently asked questions
References and further reading
Illustrations are explanatory models. Colors, proportions and selected structures are simplified to support the topic.
Keep exploring
Try it free
Start with a figure. Make it yours.
Open a starter, adapt the labels, and create an illustration for your next lecture or research discussion.
Starter examples are free to open. AI generation and edits use credits.